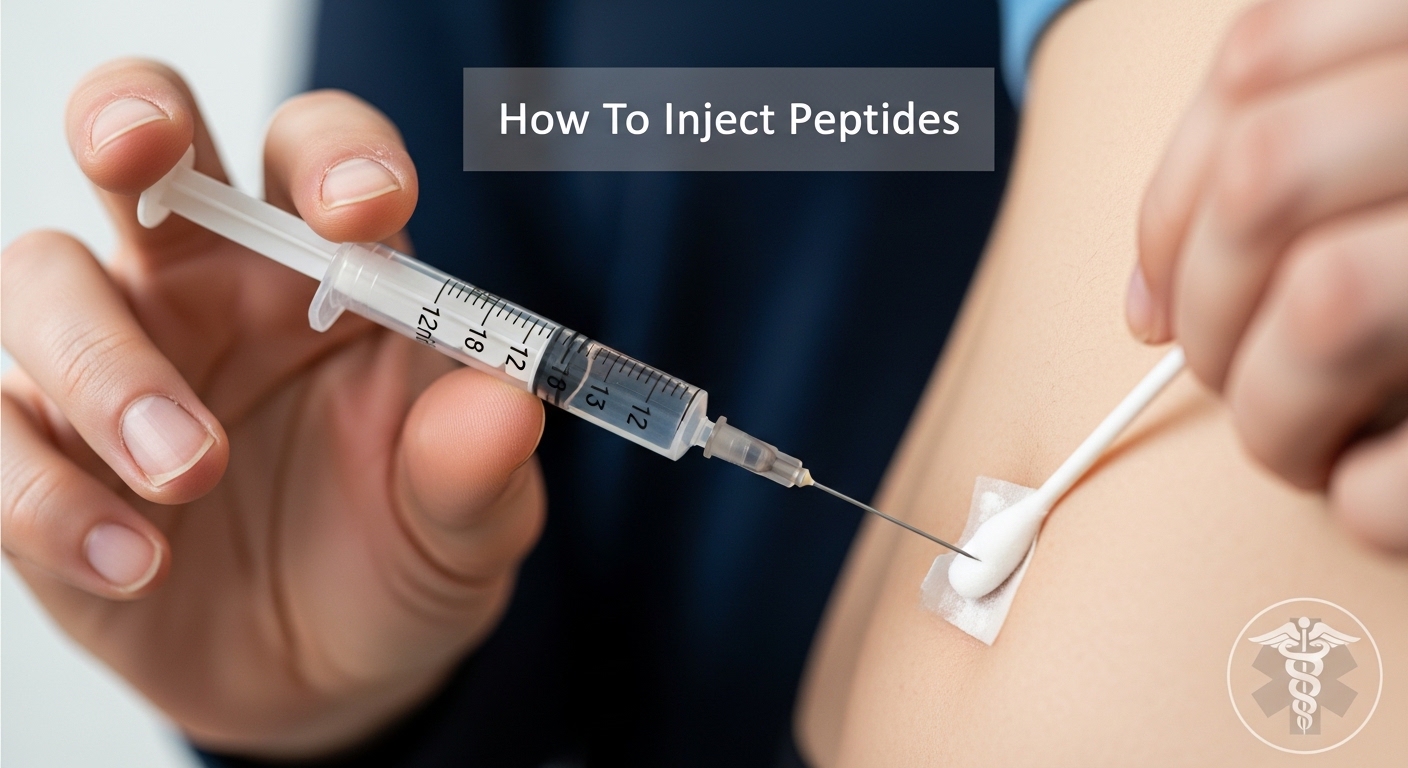
Your first peptide injection can feel intimidating. I remember staring at that tiny needle, wondering if I was about to do something terribly wrong.
Here’s the reassuring truth: millions of people safely inject peptides at home every single day. With proper technique, it becomes as routine as brushing your teeth.
Based on my experience helping hundreds of people through their first injections, the key to success is understanding the fundamentals before you start. This guide covers everything from supplies and injection sites to step-by-step instructions for both subcutaneous and intramuscular methods.
By the end, you’ll have the confidence and knowledge to administer peptides safely and with minimal discomfort.
Medical Disclaimer: This guide is for educational purposes only. Always consult a licensed healthcare provider before starting any peptide regimen. Peptides should only be obtained through legitimate sources and used under medical supervision.
ContentsTable of Contents
- 1Subcutaneous vs Intramuscular: Which Method for Your Peptide?→
- 2Which Peptides Use Which Method?→
- 3Essential Supplies for Peptide Injections→
- 4Required Supplies Checklist→
- 5Optional but Helpful→
- 6Where to Source Supplies→
- 7Best Injection Sites for Peptides→
- 8Abdomen (Most Recommended)→
- 9Outer Thigh→
- 10Back of Upper Arm→
- 11Site Rotation Schedule→
- 12How to Inject Peptides Subcutaneously: Step-by-Step Instructions→
- 13Preparation Phase→
- 14Injection Phase→
- 15How to Inject Peptides Intramuscularly?→
- 16IM Injection Sites→
- 17Step-by-Step IM Injection→
- 18How to Make Peptide Injections Painless?→
- 197 Painless Injection Techniques→
- 20Overcoming Needle Anxiety→
- 21Practical Tips for Needle Anxiety→
- 22Common Peptide Injection Mistakes to Avoid→
- 231. Reusing Needles or Syringes→
- 242. Injecting Too Fast→
- 253. Not Rotating Sites→
- 264. Skipping the Alcohol Wipe→
- 275. Injecting Into Muscle Accidentally→
- 286. Improper Peptide Storage→
- 29Post-Injection Care and Site Rotation→
- 30Immediate Aftercare→
- 31Managing Minor Reactions→
- 32Tracking Your Injections→
- 33Safety Warnings and When to Seek Help→
- 34Stop Injecting and Seek Medical Care If:→
- 35Contamination Prevention→
- 36Frequently Asked Questions→
- 37Where is the best place to inject peptides?→
- 38Do you inject peptides into muscle or fat?→
- 39What is the best time to inject peptides?→
- 40Do peptide injections hurt?→
- 41How often should I inject peptides?→
- 42Can you reuse peptide needles?→
- 43What needle size is best for peptide injections?→
- 44How do I dispose of used peptide needles?→
- 45Final Thoughts: Your Path to Confident Peptide Injections→
Subcutaneous vs Intramuscular: Which Method for Your Peptide?
Most peptides are injected subcutaneously (under the skin into fat tissue), not into muscle. This is the easier, less painful method preferred for at-home administration.
However, some peptides can be injected intramuscularly for faster absorption or when targeting a specific injury site.
| Feature | Subcutaneous (SubQ) | Intramuscular (IM) |
|---|---|---|
| Injection Depth | Into fat layer (shallow) | Into muscle tissue (deeper) |
| Needle Gauge | 29-31 gauge (thinner) | 22-25 gauge (thicker) |
| Needle Length | 5/16 to 1/2 inch | 1 to 1.5 inches |
| Absorption Speed | Gradual, sustained release | Faster absorption |
| Pain Level | Minimal to none | More noticeable |
| Skill Required | Beginner-friendly | Intermediate |
Which Peptides Use Which Method?
Subcutaneous injection is standard for:
- Semaglutide and tirzepatide (GLP-1 weight loss peptides)
- BPC-157 (healing and recovery)
- CJC-1295 and Ipamorelin (growth hormone secretagogues)
- GHK-Cu (skin and tissue repair)
- AOD 9604 (fat loss)
- Sermorelin (growth hormone)
Intramuscular injection may be used for:
- TB-500 (especially when targeting specific injury sites)
- BPC-157 (optional IM for localized healing)
- Certain growth hormone peptides for faster onset
When in doubt, subcutaneous is almost always the safer and more comfortable choice for home administration.
Essential Supplies for Peptide Injections
Having the right supplies makes injection easier and safer. Here’s exactly what you need, with specific product recommendations based on what works best.
Required Supplies Checklist
- Insulin syringes (29-31 gauge, 5/16″ to 1/2″ needle): 31-gauge is thinnest and least painful. The 5/16-inch length works for most body types. Buy sterile, individually wrapped syringes.
- Alcohol prep pads: 70% isopropyl alcohol wipes for cleaning injection sites and vial tops.
- Bacteriostatic water (BAC water): For reconstituting lyophilized (freeze-dried) peptides. Do not use regular sterile water as it lacks the preservative needed for multi-dose vials.
- Sharps container: FDA-cleared container for safe needle disposal. Never throw loose needles in regular trash.
- Your peptide vial: Store according to manufacturer instructions (typically refrigerated after reconstitution).
Optional but Helpful
- Cotton balls or gauze: For applying gentle pressure after injection.
- Band-aids: For rare cases of minor bleeding.
- Ice pack: Can numb the injection site before injection for sensitive individuals.
- Peptide reconstitution calculator: Online tools help calculate exact water amounts for your dose.
Pro Tip: Based on user reports, 31-gauge 5/16-inch insulin syringes from major online retailers work excellently for SubQ peptide injections. They’re thin enough to be nearly painless and long enough to reach the subcutaneous fat layer.
Where to Source Supplies
Insulin syringes are available at most pharmacies without a prescription in many states. Online retailers offer bulk packages that reduce per-unit cost.
Bacteriostatic water should come from a reputable medical supply company. Avoid unknown vendors as sterility is critical.
Best Injection Sites for Peptides
The best places for subcutaneous peptide injections are the abdomen (2+ inches from the navel), outer thighs, and back of upper arms. Each site has advantages depending on your comfort and experience level.
Abdomen (Most Recommended)
Location: Anywhere on the belly at least 2 inches away from the navel. The area below the belly button and to the sides (love handle region) works well.
Why it’s popular: According to user reports, abdominal injections cause the fewest side effects. The area has consistent fat distribution and is easy to see and access.
Avoid: Do not inject directly around or into the belly button. Stay away from any scars, moles, or areas of skin irritation.
Outer Thigh
Location: Front and outer portion of the thigh, roughly the middle third between hip and knee.
Best for: People with less abdominal fat or those who prefer alternating between upper and lower body sites.
Note: Some users report thigh injections as slightly more uncomfortable than abdominal. If you experience this, the abdomen may be a better choice.
Back of Upper Arm
Location: The fatty area on the back of the arm, between shoulder and elbow.
Consideration: This site may require assistance from another person since it’s harder to reach and see clearly.
Site Rotation Schedule
Rotating injection sites prevents tissue damage, reduces scarring, and maintains consistent absorption. Here’s a simple rotation pattern:
- Day 1: Left side of abdomen
- Day 2: Right side of abdomen
- Day 3: Left thigh
- Day 4: Right thigh
- Day 5: Return to left abdomen (different spot)
Move at least 1 inch from your previous injection site each time. Keep a simple log or use a body diagram to track where you’ve injected.
How to Inject Peptides Subcutaneously: Step-by-Step Instructions
Here’s how to properly inject peptides subcutaneously, broken down into clear steps. This process takes 2-3 minutes once you’re comfortable with it.
Quick Summary: Wash hands, clean vial and site, draw peptide, pinch skin, insert needle at 45-90 degrees, inject slowly, withdraw, apply pressure, dispose safely.
Preparation Phase
- Wash your hands thoroughly. Use soap and water for at least 20 seconds. This is non-negotiable for preventing infection.
- Gather all supplies. Have your syringe, alcohol pads, peptide vial, and sharps container within easy reach on a clean surface.
- Clean the vial top. Wipe the rubber stopper of your peptide vial with a fresh alcohol prep pad. Let it air dry for 10 seconds.
- Prepare the syringe. Remove the syringe from its sterile packaging. Pull back the plunger to draw in the amount of air equal to your peptide dose.
- Draw the peptide. Insert the needle through the rubber stopper. Push air into the vial (this prevents a vacuum), then invert the vial and slowly pull back the plunger to draw your dose. Check for air bubbles.
- Remove air bubbles. If air bubbles are present, tap the syringe gently with your fingernail to make bubbles rise to the top. Slowly push the plunger to expel air while keeping the peptide solution in the syringe.
Injection Phase
- Clean the injection site. Use a fresh alcohol prep pad to clean the skin where you’ll inject. Wipe in a circular motion from center outward. Allow to air dry completely.
- Pinch the skin. Using your non-dominant hand, gently pinch a 1-2 inch fold of skin at your injection site. This lifts the fat layer away from muscle.
- Insert the needle. Hold the syringe like a pencil or dart with your dominant hand. In one smooth motion, insert the needle into the pinched skin at a 45-90 degree angle. For most insulin syringes, 90 degrees works well.
- Inject the peptide. Slowly and steadily push the plunger down to inject the full dose. Take about 5-10 seconds. There’s no need to rush.
- Withdraw the needle. Pull the needle straight out at the same angle you inserted it. Release the pinched skin.
- Apply gentle pressure. Press a cotton ball or clean finger against the injection site for 10-30 seconds. Do not rub or massage the area.
- Dispose of the needle safely. Immediately place the used syringe in your sharps container. Never recap needles. Never reuse syringes.
Important: The entire injection process should be nearly painless if done correctly. If you feel significant pain, you may be injecting too quickly or into muscle tissue. Adjust your angle or try a different site next time.
How to Inject Peptides Intramuscularly?
Some peptides, particularly TB-500 for localized injury treatment, may benefit from intramuscular injection. This method delivers peptide directly into muscle tissue for potentially faster absorption.
Intramuscular injection requires slightly different technique and equipment compared to subcutaneous.
IM Injection Sites
Deltoid (upper arm): The muscle at the top of your arm, about 2-3 finger widths below the shoulder bone. Limited to 1-2ml maximum volume.
Vastus lateralis (outer thigh): The outer middle portion of the thigh. Can accommodate larger volumes.
Ventrogluteal (hip): The upper outer portion of the buttock/hip area. Often requires assistance from another person.
Step-by-Step IM Injection
- Wash hands and gather supplies. For IM, use a 22-25 gauge needle, 1-1.5 inches in length.
- Clean the vial and draw peptide using the same technique as SubQ.
- Clean the injection site with alcohol and let it dry.
- Stretch the skin. Unlike SubQ, do not pinch. Use your non-dominant hand to stretch the skin taut at the injection site.
- Insert the needle at 90 degrees. Use a quick, dart-like motion to insert the needle straight into the muscle.
- Aspirate (optional). Pull back slightly on the plunger to check for blood. If blood appears, withdraw and try a new site.
- Inject slowly. Push the plunger steadily over 5-10 seconds.
- Withdraw and apply pressure. Remove the needle straight out and press firmly for 30-60 seconds.
Time Saver: If you’re new to peptide injections, start with subcutaneous injections until you’re completely comfortable. IM is rarely necessary for most peptides and requires more precise technique.
How to Make Peptide Injections Painless?
Good news: properly administered subcutaneous injections should cause minimal to no pain. Here are proven techniques to make your injections as comfortable as possible.
7 Painless Injection Techniques
- Let the peptide reach room temperature. Cold peptide straight from the refrigerator causes more discomfort. Let the syringe sit at room temperature for 5-10 minutes before injecting, or warm it briefly in your hands.
- Use the thinnest needle possible. 31-gauge needles are barely felt by most people. The difference between 29g and 31g may seem small, but users consistently report 31g as more comfortable.
- Inject slowly. Pushing peptide too quickly into tissue causes pressure and discomfort. Take a full 5-10 seconds to inject your dose.
- Use the dart method. Insert the needle in one quick, smooth motion rather than pushing slowly through the skin. Think of it like removing a bandage quickly versus slowly.
- Relax the injection area. Tense muscles increase pain perception. Take a breath and consciously relax before inserting the needle.
- Choose the right site. Many users report the abdomen as less sensitive than thighs. If one site consistently hurts, try another.
- Ice the area beforehand (optional). For particularly sensitive individuals, applying an ice pack for 1-2 minutes before injection can numb the area.
Within a week or two of consistent practice, most users report that injections become completely routine and nearly sensation-free.
Overcoming Needle Anxiety
If the thought of self-injection makes you nervous, you’re not alone. Fear of needles is one of the most common concerns I hear from people starting peptide therapy.
Here’s the perspective that helps most people: the anticipation is almost always worse than the actual injection.
Practical Tips for Needle Anxiety
Start with observation. Watch several instructional videos before your first injection. Seeing others do it calmly helps normalize the process.
Practice without peptide. Some people find it helpful to practice the motions (without actually injecting) to build muscle memory and confidence.
Use distraction. Watch TV, listen to music, or have a conversation during injection. Looking away from the needle often helps.
Breathe deeply. Take 3 slow, deep breaths before injecting. Exhale during needle insertion.
Remind yourself of the scale. Insulin needles used for SubQ injections are incredibly thin. They’re far smaller than needles used for blood draws or vaccinations.
Celebrate small wins. Your first injection is the hardest. After 2-3 successful injections, most people wonder why they were ever worried.
Pro Tip: Forum users consistently report that within a week or two, self-injection becomes completely automatic and second nature. The learning curve is much shorter than most people expect.
Common Peptide Injection Mistakes to Avoid
Even experienced users occasionally make mistakes. Here are the most common errors and how to prevent them.
1. Reusing Needles or Syringes
The mistake: Using the same needle more than once to save money or time.
Why it’s dangerous: Needles become dull after one use, causing more pain and tissue damage. More importantly, reuse introduces bacteria and infection risk.
The rule: One needle, one injection. Always.
2. Injecting Too Fast
The mistake: Pushing the plunger quickly to “get it over with.”
The problem: Rapid injection causes tissue pressure, pain, and may affect absorption.
The fix: Take 5-10 seconds for each injection. Slow and steady is more comfortable and effective.
3. Not Rotating Sites
The mistake: Using the same injection spot repeatedly because it’s convenient.
The problem: Repeated injections in one area can cause tissue hardening (lipohypertrophy), reduced absorption, and scarring.
The fix: Follow a rotation schedule and track your injection sites.
4. Skipping the Alcohol Wipe
The mistake: Assuming clean-looking skin doesn’t need cleaning.
The problem: Invisible bacteria on skin can enter through the needle puncture, causing infection.
The fix: Always clean the injection site with 70% isopropyl alcohol. Let it dry before injecting.
5. Injecting Into Muscle Accidentally
The mistake: Inserting the needle too deep during subcutaneous injection.
The problem: Peptide intended for SubQ absorption gets delivered to muscle, potentially altering absorption rate and causing unnecessary pain.
The fix: Pinch the skin properly and use the appropriate needle length (5/16″ for most people). If you feel resistance or significant pain, you may be in muscle.
6. Improper Peptide Storage
The mistake: Leaving reconstituted peptides at room temperature or in direct light.
The problem: Peptides degrade when stored improperly, reducing potency and potentially becoming ineffective.
The fix: Store reconstituted peptides in the refrigerator. Keep them away from light. Follow specific storage instructions for each peptide.
Post-Injection Care and Site Rotation
What you do after injection matters for comfort and long-term site health.
Immediate Aftercare
Apply gentle pressure for 10-30 seconds using a cotton ball or clean finger. This minimizes bleeding and bruising.
Do not rub or massage the injection site. This can disperse the peptide too quickly and may increase bruising.
A small drop of blood is normal. Cover with a band-aid if needed.
Managing Minor Reactions
Slight redness: Normal and usually fades within 30 minutes to an hour.
Small lump at injection site: May occur if peptide is injected too quickly or too shallowly. Usually absorbs within hours. Massage gently if it persists.
Minor bruising: Can happen if you nick a small blood vessel. Rotates sites and applies pressure to prevent.
Tracking Your Injections
Consider keeping a simple log with:
- Date and time of injection
- Injection site used
- Peptide and dose
- Any reactions or notes
This helps maintain consistent rotation and identifies any patterns with specific sites or doses.
Safety Warnings and When to Seek Help
While peptide injections are generally safe when performed correctly, certain signs require immediate attention.
Stop Injecting and Seek Medical Care If:
- Signs of infection: Increasing redness, warmth, swelling, or pus at injection site that worsens over 24-48 hours
- Fever: Temperature above 100.4F (38C) following injection
- Severe allergic reaction: Difficulty breathing, severe swelling, hives spreading beyond injection site, dizziness
- Persistent pain: Pain that doesn’t resolve within 24 hours or worsens significantly
- Signs of abscess: Hard, painful lump that grows larger over days
Contamination Prevention
Never use cloudy or discolored peptide solutions. If your reconstituted peptide looks different than expected, do not inject it.
Check expiration dates. Both peptides and bacteriostatic water have shelf lives. Expired products should not be used.
Use single-use needles only. Never share needles with anyone for any reason.
Store properly. Bacteria can grow in improperly stored peptides. Follow refrigeration guidelines strictly.
FDA Disclaimer: Peptides purchased from research suppliers are not FDA-approved for human use. Always consult with a healthcare provider before using any peptides. Medically prescribed peptides should be obtained through licensed pharmacies.
Frequently Asked Questions
Where is the best place to inject peptides?
The best places for subcutaneous peptide injections are the abdomen (at least 2 inches from the belly button), outer thighs, and back of the upper arms. Most users prefer the abdomen because it has consistent fat distribution and tends to cause fewer side effects like nausea. Rotate between sites to prevent tissue damage.
Do you inject peptides into muscle or fat?
Most peptides are injected subcutaneously (into the fat layer under the skin), not into muscle. Subcutaneous injection is easier, less painful, and provides gradual absorption. Some peptides like TB-500 can be injected intramuscularly when targeting a specific injury site, but this requires different technique and longer needles.
What is the best time to inject peptides?
The best injection time depends on the specific peptide. Growth hormone secretagogues like CJC-1295 and Ipamorelin are typically injected before bed on an empty stomach, as growth hormone peaks during sleep. Semaglutide and tirzepatide are usually taken once weekly at the same time. BPC-157 is often taken 1-2 times daily. Follow your specific peptide’s guidelines.
Do peptide injections hurt?
Properly administered subcutaneous injections cause minimal to no pain. Using a thin 31-gauge needle, injecting slowly, and allowing the peptide to reach room temperature can make injections nearly sensation-free. Most users report that the anticipation is worse than the actual injection.
How often should I inject peptides?
Injection frequency varies by peptide. Semaglutide is typically once weekly. BPC-157 and TB-500 are often 1-2 times daily. CJC-1295 with DAC may be 1-2 times weekly, while CJC-1295 without DAC is daily. Always follow the dosing protocol provided by your healthcare provider or the specific peptide guidelines.
Can you reuse peptide needles?
No, never reuse needles. Single-use needles should be disposed of immediately after one injection. Reusing needles increases infection risk, causes more pain due to needle dulling, and can introduce bacteria into your peptide vial. The small cost savings is not worth the health risks.
What needle size is best for peptide injections?
For subcutaneous peptide injections, 29-31 gauge insulin syringes with a 5/16 to 1/2 inch needle length work best. 31-gauge is the thinnest and least painful option. For intramuscular injections, 22-25 gauge needles that are 1-1.5 inches long are appropriate.
How do I dispose of used peptide needles?
Place used needles immediately into an FDA-cleared sharps container. Never throw loose needles in regular trash or recycling. When the container is full, follow your local regulations for disposal which may include drop-off locations at pharmacies, hospitals, or special pickup services. Never recap needles before disposal.
Final Thoughts: Your Path to Confident Peptide Injections
Learning to inject peptides may seem daunting at first, but with proper technique and practice, it becomes a simple, nearly painless routine.
Here’s what to remember:
- Most peptides use subcutaneous injection, which is beginner-friendly and nearly painless
- Use 29-31 gauge insulin syringes for maximum comfort
- Rotate injection sites to maintain tissue health
- Never reuse needles and always maintain sterile technique
- Within a week or two, self-injection becomes completely automatic
Start slow, follow each step carefully, and don’t hesitate to consult a healthcare provider if you have questions about your specific peptide protocol.
Disclaimer: This guide is for informational purposes only and does not constitute medical advice. Always consult a licensed healthcare provider before starting any peptide regimen. Proper injection technique should be learned under professional guidance when possible.